Friday, March 31, 2017

Using Echo Park Stash

Hello and happy Friday!
Today I am sharing a layout using a few older guy lines from Echo Park along with a Cut Shoppe cut file. My background was created with mists for another layout, that I obviously didn't use. It was perfect for this page!


I added a mat to my photo and then added some stickers and tangled thread. 


I backed the cut file with some fun papers and added the arrow sticker popped up with foam tape to add some dimension.


I fussy cut this cut star from one of the papers, popped it up with foam tape and added some tangled thread.


Thanks for stopping by and have a great weekend!

Thursday, March 30, 2017

{Heart} This

Happy Thursday!
I have been getting the Hip Kit Club's main kit for several months now and finally had some time to play with one. I used the January kit along with the Scribble 3 cut file from Just Nick and a Hip Kit Club sketch for this layout:


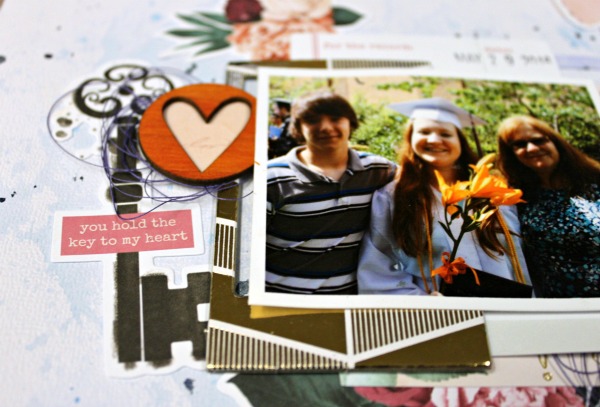
I added watercolor to my background and also used watercolor to color the cut file. I layered a few of the diecuts from Pink Paislee ephemera pack and added some tangled thread. I used wood veneer for my title. The heart was colored with Gelatos and then I used a black marker to add the stitched lines. "This" is colored with an ink pad.


I colored the wood veneer hearts using an ink pad. Here I also added some tangled thread and a Becky Higgins Project Life gold frame. I also added the key diecut. 


I added this sweet butterfly from the Pink Paislee ephemera pack. I added my date with a stamp. 


Thanks for stopping by and have a great day!

Wednesday, March 29, 2017

Wishing You...

Hello again!
Today I am sharing a card I created using a sketch at Sketch-N-Scrap. I used Maggie Holmes Bloom for this pretty card:


Don't you just love that deer? I do and have been afraid of not putting it on the right project. I love how this card turned out!

Here is the sketch:


Enjoy the rest of your day!


Tuesday, March 28, 2017

Family Selfie

Hey there!
We are on spring break this week, so I am hoping to get some scrappy time. I am finally getting around to posting this layout I created last week for Scrap Our Stash's March sketch challenge and Another Freaking Scrappy Challenge to use chipboard and something old.

I hand stitched a circle using embroidery floss and then added watercolors to my background:


 I used mostly Fancy Pants Happy Place along with a little Heidi Swapp. I used a cut file from Just Nick, cut it out on white cardstock and then added watercolor. I used a chipboard frame from Crate Paper:


Check out that cool bird! I have had this Heidi Swapp tag in my stash forever and finally used it:


I added some of the Happy Place ephemera along with a heart cut from my Cameo that has been sitting on my desk for some time. I also added a few Heidi Swapp word phrase stickers: 


A few more diecuts from the ephemera pack along with a fussy cut camera:


Here is the sketch:

For the word part of the challenge I used:
C: cardstock, circles, camera
H: Heidi Swapp, heart, Happy Place by Fancy Pants
A: arrow, adhesive
R: red
M: Martha Stewart punch

Thanks for stopping by and have a great day!


Monday, March 27, 2017

Beach Babe


Hey there Scrappy Friends!!
Today I am sharing a colorful summer layout I created using ScraPerfect, Fancy Pants and Robin's Nest products. 


I created my background using watercolors. 
Then I added the Palm Tree Rub-ons from Robin's Nest.


Here is a close up of one of the palm tree rub-ons and check out those super cute flip flops! Those are from Fancy Pants. Both are perfect for a summer page!


I colored the "Beach Babe" title using Gelatos.
I fussy cut the "Today" from a card in the Safron Cards from the Robin's Nest. I also added a few more embellies from Fancy Pants.


Here is another palm tree close up layered with a few more embellies. 


I fussy cut the "Hello Sunshine" from  a card in the Safron Cards. This yellow paper, I had previously cut a sun and used on another layout, but kept the negative piece. It worked perfect as a layer under my photo. 


I attached pretty much everything on this layout using ScraPerfect's Best Glue Ever with the No Clog Writing Cap. I love this glue!

Thanks for stopping by and have a great day!

Friday, March 24, 2017

Card for ScraPerfect & Robin's Nest Cross Promo

Hey there scrappy friends!
I am here today to share a card I created for the cross promo of the Robin's Nest  and ScraPerfect:


I use to struggle with applying ribbon to a card. I have tried pretty much everything- glue, double sided tape, stitching. Almost all the time, it bunched, wasn't straight or something. I was pretty skeptic about trying the Best Glue Ever, but once I did, I won't go back to anything else!
It's easy to use:
Apply a small amount in a line where the center of your ribbon will go. I use my finger to spread it evenly. Once it dries to a clear finish, you can add the ribbon. What I love most about the glue is that it doesn't see through the ribbon!


Items used:

Thanks for stopping by and have a great day!

Thursday, March 23, 2017

Sketches In Thyme

Hello!
Today I am sharing a layout I have up over at Sketches In Thyme today.
I combined American Crafts, Paper House and a cut file from Just Nick for this layout of Sierra and a few friends at their senior prom:


I added a border using a punch. I added some circles, fussy cut label and an Evalicious wood veneer that I colored with silver mist:


The title is a combination of October Afternoon mini alphas and Thickers. I also added some Tim Holtz word sticker phrases here:


I added a few pieces of MAMBI chipboard stickers along with an Evalicious puffy banner sticker:


I fussy cut the camera from one of the AC papers. I added in a black Doodlebug doily. I also added another piece of MAMBI chipboard and a Simple Stories clear sticker:


I would like to give credit to one of the girls mom for the beautiful photo she shared with me.

Here is the fun sketch:


Thanks for stopping and have a great day!

Lawn Fawn & ScraPerfect

Hello!
Lisa  here today and I am excited to share another card I created using Lawn Fawn and ScraPerfect products during our team up this month.


To create this card I used  the Perfect Crafting Pouch on my white cardstock. This helps get a nice crisp image when stamping. Then I used the Elphie Selfie Stamps and stamped them on the white cardstock using black ink. I colored the images using a small paintbrush and watercolors. Once they were dry, I used the Elphie Selfie Lawn Cuts and ran them through my Cuttlebug. I love the white edges around the stamped image! Plus, it was so easy to do!
I used the Best Glue Ever and some foam tape to adhere my stamped images to papers from the Perfectly Plaid papers.
Here is a close up of all the dimension of my card:


Here is what I used to create this fun card:

I love these Lawn Fawn stamps and Lawn Cuts and will be getting more of them in the future!
Thanks for stopping by and have a great day!

Lisa

Monday, March 20, 2017

Black & White

Hello and happy Monday!
There is a new challenge up on the Cards In Envy blog today!
Today's challenge:

Create a card using Black AND White with just a smidge of another color. We definitely want to see mostly black & white and one tiny bit of color. Any Occasion.

I used Bella Blvd Illustrated Faith and came up with this card:


This was an easy card to make... I added 3 layers, some stitching and a few fussy cut flowers. 
Hope you will play along with us this month!

Thursday, March 16, 2017

He's So Fine!

Hey there!

I am sharing a layout I created for Creative Embellishments and have up on their blog today.
As I was browsing the Creative Embellishment Store, I came across the He's So Fine chipboard title pieces. I knew right away that I had to have this piece for a layout of my son all dressed up for Homecoming last year. I paired it with: Grunge Gear Corner Grunge Circle Frames and Gears 1" I love the outcome!

   
I added Tim Holtz Distress Ink to both the Grunge Circle Frame and the Grunge Gear Corner. Then added a few black ink spatters.


Just a tip before applying ink to chipboard- I always try it on the back of the piece of chipboard to make sure I have the right color. I added a chipboard pennant, flowers and a punched butterfly to this cluster around the Grunge Gear Corner:


 For the He's So Fine Title Piece, I heat embossed using black embossing powder. Here you can see a close up of the Grunge Circle Frame:


 I added a few more embellishments to create a small cluster down in the lower right corner:


I added some flowers, some painted with watercolors, a piece of chipboard, punched butterflies and a few of the 1" Gears, which I also colored with the distress inks with ScraPerfect Best Glue Ever. I love how the gears keep the theme of the guy page, even though I have flowers on it. A year ago, I would have never added flowers to a guy page, LOL


 Thanks for stopping by and sharing your day with me! Stay scrappy my friends!


Monday, March 13, 2017

Lawn Fawn & ScraPerfect Team Up

Hey there!
The ScraPerfect DT have teamed up with Lawn Fawn this month!
I am excited to share a card I created using Lawn Fawn and ScraPerfect products!


To create this card I used  the Perfect Crafting Pouch on my white cardstock. This helps get a nice crisp image when stamping. Then I used the Elphie Selfie Stamps and stamped them on the white cardstock using black ink. I colored the images using a small paintbrush and watercolors. Once they were dry, I used the Elphie Selfie Lawn Cuts and ran them through my Cuttlebug. I love the white edges around the stamped image! Plus, it was so easy to do!

I used the Best Glue Ever and some foam tape to adhere my stamped images to papers from the Perfectly Plaid papers.

Here is a close up of all the dimension of my card:


Here is what I used to create this fun card:


I love these Lawn Fawn stamps and Lawn Cuts and will be getting more of them in the future!
Thanks for stopping by and have a great day!

Lisa

Sunday, March 12, 2017

Beautiful!

Hey there!
Hope you are having a wonderful weekend!
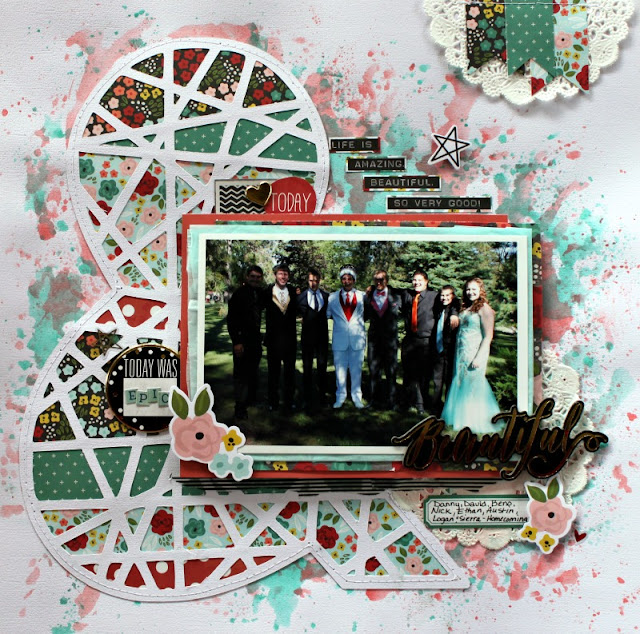
I found a few hours of scrappy time earlier this week and created this layout using a Cut Shoppe cut file, Simple Stories and the March tic-tac-toe board at Scrap Our Stash.
I used: washi tape, gold and mini alphas:


I backed the cut file with papers from the 6x6 pad and stitched in place over my watercolor background.


I used Mambi black and gold chipboard.


I popped some of the flower diecuts up with foam tape to add some dimension. I also added the word "epic" using October Afternoon mini alphas.


I fussy cut the "today" circle, the black and white chevron frame and the "Life is amazing, beautiful, so very good" out of patterned papers.


Finally, I added a banner and doily on the top.

Here's the tic-tac-toe board:


Thanks for stopping by and have a great day!


Monday, March 6, 2017

Hello!

Hey there!
It's the first Monday of the month, that means a new challenge is up over at Cards In Envy!
Here's the challenge for the next 2 weeks:
Simple cards only. Think one layer, stamped on card base etc. Perhaps a card you can make in 10 minutes or less?? Any Occasion.

This card does have a few layers and some stitching, but it took me under 10 minutes to make!
I used Pebbles From Me To You: 


We would love to have you join in on the challenges this month. There is a new challenge posted on the first and third Mondays of the month.

Stay scrappy my friends!

Thursday, March 2, 2017

Wish

IF you are here for the SpiegelMom/Creative Embellishment blog hop, scroll down or click HERE.

Hello!
I am to share a page I have up on the Creative Embellishment Blog today. I used a photo of Austin and I on parent's night at his football game last October. I used a variety of Creative Embellishment goodies on this page:


I used a stencil and light modeling paste to create texture on my background. I added some mists and watercolors on top and finally stamped using black ink and the Circles Stamp. The word "Wish" is from the Dream Word Set. I love the font! I just colored it using an ink pad.


Under my photo, I added a Circle Doodle Frame. I also added some Wood Veneer Stars. Both of these were colored with the same black ink:


I am not much of a flower user on boy pages, but I love the outcome on this layout!
In the cluster of embellies under the photo, I tucked in a Wood Veneer Football and a Heart. I also added flowers, thread and butterflies:


This piece is one of Creative Embellishments new chipboard pieces. It's called Washi Tape Clusters. Isn't it just so cool?! I love it! I added Gesso first and then used inks and Gelatos to color it. I also added the "Snap" flair from the Smile Set along with another Wood Veneer Star and some flowers:


 Around the edge of my page, I added a strip of patterned paper and some torn washi tape. 

 Thanks for stopping by and sharing your day with me!